Zodiac
Zodiac Genuine Diaphragm Cassette
- SKU:
- W81710
- Shipping:
- Calculated at Checkout
Bulk discount rates
Below are the available bulk discount rates for each individual item when you purchase a certain amount
| Buy 2 - 5 | and get 10% off |
Description
The Zodiac Diaphragm Cassette replacement spare part will fit all cassette style cleaners such as G2, G3, G4, Aquasphere, Contractor, Genie, Zoom and more. If the diaphragm has a hole in it the cleaner will stop working this is generally the first place you would look. The diaphragm attaches directly to the inner extension pipe with the help of a retaining ring.
How to replace a G2 Diaphragm
STEP 1: Procedure to Remove Diaphragm.
Hold the G2™ with one hand and unscrew the Cassette Swivel nut +/- 3 turns anti-clockwise.
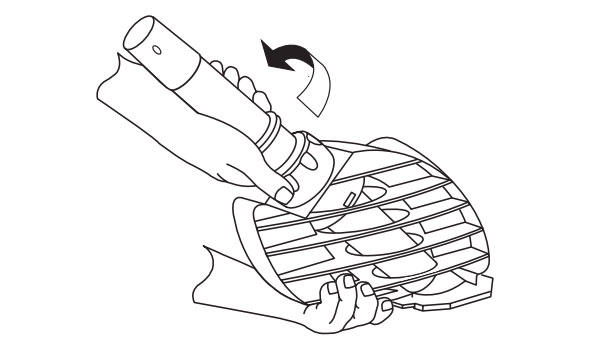
Pull the Cassette System from the G2™ body
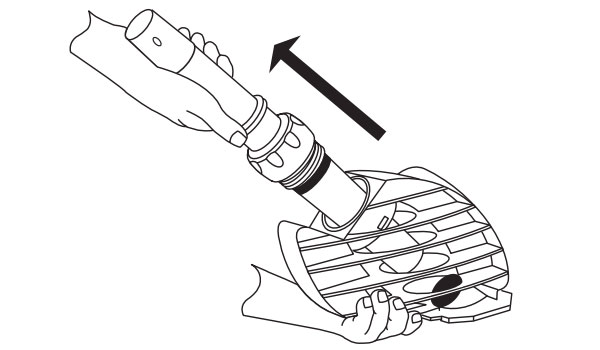
STEP 2: Removal of Diaphragm
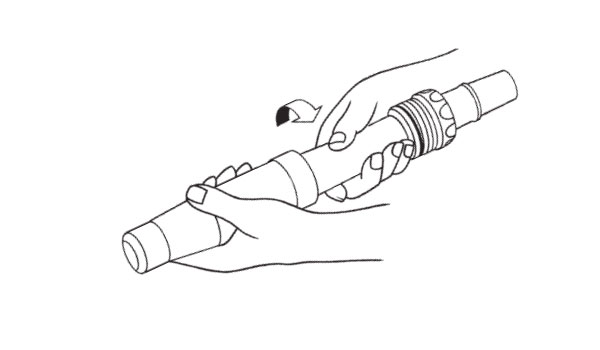
Grasp the Extension Pipe in one hand and unscrew the Cassette +/- 4 turns anti-clockwise until the two separate.
Push the Inner Extension Pipe with Diaphragm through the Cassette Body.
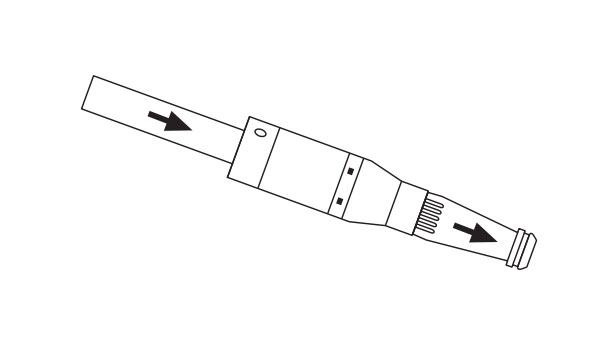
Remove the Diaphragm from the Inner Pipe, leaving the Retaining Ring on the Diaphragm.
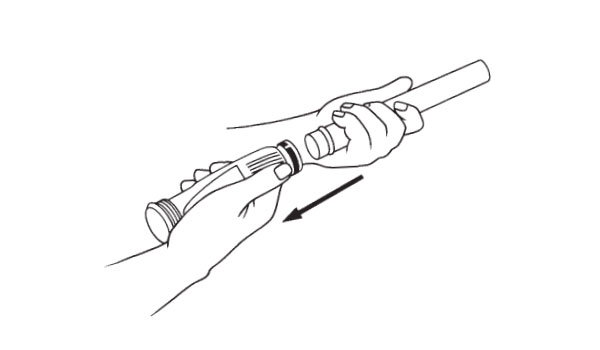
STEP 3: Examination
Inspect the Diaphragm for a blockage or any damage. Even small holes will compromise its operation. If any damage is evident, i.e. a cut or hole on the sides of the Diaphragm, replace it. If there is a blockage, carefully remove it. If this can’t be done, a garden hose may be used to flush the obstacle through. Do not use any sharp objects to probe or push an obstruction as this may damage the Diaphragm.
STEP 4: Diaphragm Assembly
Prior to re-installing the Diaphragm, rinse the Diaphragm and the Inner Extension Pipe thoroughly to remove any grit. Attach the Diaphragm to the inner Extension Pipe. Slide the top of the Inner Extension Pipe (the end which is opposite the Diagram) into the body.
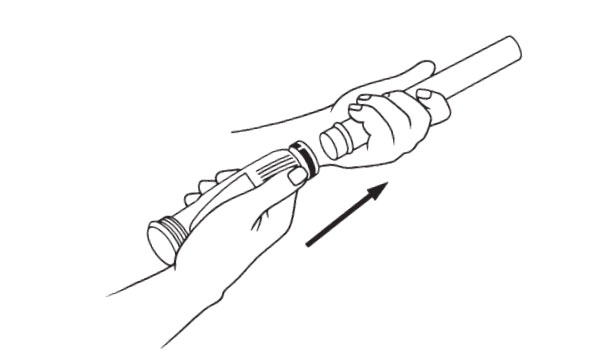
Pull the Inner Extension Pipe with Diaphragm through the Cassette Body
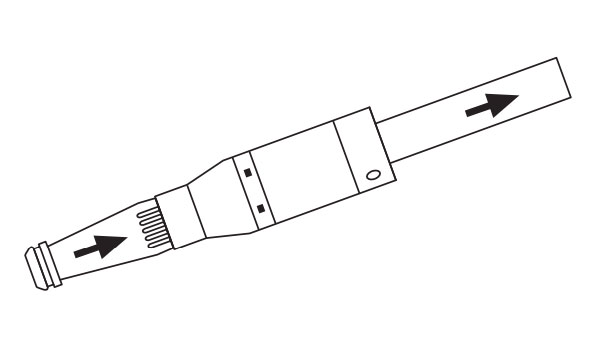
STEP 5: Resetting the Diaphragm If the gap of the Diaphragm is excessive (more than 5 mm), yet the Diaphragm is not torn or damaged, it can be reset by leaving one ridge of the Diaphragm exposed from the Cassette Body. This may resolve performance-related problems such as running and stopping, coverage problems and/or your G2™ not climbing walls. Hold the Cassette and tighten the Extension Pipe by turning clockwise. Do not over-tighten.
STEP 6: Cassette Reassembly Re-insert the assembled Cassette unit into the G2™ body and tighten Cassette Swivel nut +/- 3 turns clockwise until Hand-nut is flush with the threaded Locking Collar.


